Monday, August 31, 2009

Mojo 102: Thank you beary much!

My son's 2nd birthday party is going to be this upcoming Saturday! I can't believe he is already going to be 2! We received a couple early birthday gifts so I decided to use this weeks Mojo Monday sketch for some thank you cards.

The card I created for today's post uses the brand-new sets Beary Best Friends and Beary Nice Wishes- both available starting tomorrow!!! These Build-a-bear Workshop sets are so adorable.

Here are some step-by-step instructions for 'building' this card:
  • A standard A2 card base was constructed out of Bashful Blue.
  • I used my Circle Scissor Plus to cut out two circles: one 3" circle of Only Orange, and another 2.75" circle of Brocade Blue.
  • The balloon image came next. I inked up just the string portion using Basic Black ink, and stamped it directly on the circles. The balloon was inked up again and stamped onto a scratch piece of Crushed Curry Patterns DSP before being snipped out and adhered using dimensionals.
  • This cute little bear was black heat embossed onto watercolor paper. He was filled in using blender pens and Close to Cocoa, Soft Suede, Only Orange, and Brocade Blue ink pads. Finally he was snipped out and adhered to the circles.
  • I just received my photo corner punch in my last SU shipment so I was thrilled that I got a chance to use it for the sketch! I popped out corners in Brocade Blue and Only Orange. A little paper piercing detail (using the paper piercing tool and mat pack) was added to the orange piece and attached with glue dots.
  • Now onto the left side :). I cut a 1.25"x 4.25" piece of Brocade Blue and wrapped a piece of Crushed Curry Polka Dot Grosgrain ribbon around it before sticking it down to the card.
  • My stamp-a-ma-jig came out next to split up the sentiment into smaller sections using a Brocade Blue SU marker. I off-centered this piece onto a mat of Only Orange.
  • The tiny hat image was inked in Basic Black and stamped onto Whisper White. Only Orange and Brocade Blue SU markers were used to fill it in.
  • Only Orange Playground Designer Buttons were the finishing touch. I used tiny slivers of Brocade Blue card stock as thread.

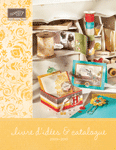
If you haven't already received a copy of the new Holiday Mini Catalog (which goes LIVE tomorrow!) please email me and I will send one to you ASAP!!


Order Stampin' Up! online 24-7! Click Here!


Recipe: Stamps: Beary Best Friends (118052), Beary Nice Wishes (118050) Ink: Basic Black (101179), Versamark (102283), Brocade Blue (100064), Only Orange (100051), Close to Cocoa (103139), Soft Suede (115657) Paper: Bashful Blue (105120), Whisper White (100730), Only Orange (102837), Brocade Blue (101166), Crushed Curry Patterns Pack DSP (115686), Watercolor Paper (105019) Accessories: Circle Scissor Plus (112530), Photo Corner Punch (109042), Playground Designer Buttons (116313), Crushed Curry Polka Dot Grosgrain (115614), Paper Piercing Tool (116631), Mat Pack (105826), Dimensionals (104430), Glue Dots (103683), Black embossing powder (109133), Heat Tool (100005), Stamp-a-ma-jig (101049)

Back from vacation: feeling under the weather

Hi All,
I just wanted to write a quick post to let you all know that we are back from vacation (had a fabulous time!). But I haven't been able to create because I have had a pretty bad cold. I am hoping to get in some stamp therapy tonight or tomorrow, though!

Thank you!


Thursday, August 27, 2009

PPA5: Halloween Theme


This weeks PPA challenge is to create a Halloween Themed card.

I wanted to try and create pumpkins using punches- and it worked pretty well, I think.

Here are the specifics:
  • This card started with a Basic Black card base measuring 5 1/2" x 5 1/2".
  • A 2" strip of Old Olive was adhered at the top.
  • A 1" strip of Elegant Eggplant was placed below the Old Olive.
  • Using the 1/2" circle punch, I popped out 5 Dusty Durango circles.
  • They were evenly spaced on the Elegant Eggplant. Some orange glitter dots (Non-SU) were placed in the center of each circle.
  • The title "Spooky" was created using the Lots of Letters Chipboard. TIP: I used a variety of fonts to create a more interesting looking title.
  • I covered each letter with Elegant Eggplant, cut them out with a hobby knife, then smoothed out the edges using a sanding block and a small nail file.
  • Jet Black StazOn was used to distress each letter.
  • The letters took a dip in some Versamark ink and were each heat embossed using Iridescent Ice embossing powder.
  • The pumpkins were created using a 1 3/8" circle punch, and a 1 1/4" circle punch. First I popped out the main circles out of Dusty Durango. Then, using the hole created from that first circle, I popped out "moon" shapes for either side. The moon shapes were adhered next to the sides of each circle for a pumpkin shape (and also makes it look like it has realistic ridges!).
  • I cut out pumpkin faces from more Basic Black, and also cut out a stem using Old Olive.
  • Using my Big Shot, the Swirls Scribbles die, and more Old Olive, I was able to create some vines for the pumpkin.
  • Two jumbo silver brads finished up the left bottom of the card.
Hope you will play along and make your own Halloween creation!


Order Stampin' Up! online 24-7! Click Here!


Recipe:
Stamps: None
Ink: Jet Black StazOn (101406), Versamark (102283)
Paper: Basic Black (102851), Old Olive (100702), Dusty Durango (115321), Elegant Eggplant (105126)
Accessories: Big Shot (113439), Swirls Scribbles Sizzlet (113441), Jumbo Brads (112534), 1/2" Circle Punch (104390), 1 3/8" Circle Punch (104401), 1 1/4" Circle Punch (104403), Glitter Dots (non-su), Lots of Letters Chipboard (109182), Iridescent Ice Embossing Powder (101930), Sanding Block (103301)

Friday, August 21, 2009

Disneyland here we come!

That is right! By the time you read this post, my family and I will be on our way to Seattle and then off to Disneyland in a few days! We are very excited! Because we will be on vacation you wont be hearing much from me in the next week. I do however have a special post ready for next week's Pals Paper Arts challenge.

My goal for this card was to incorporate Teresa Kline's Mojo Sketch (to celebrate 100 challenges), and the use of some Apricot Appeal card stock. I have so much of it from purchasing several Soft Subtle assortment packs, and I never think to use it. I was determined to change that! I combined Apricot Appeal with Whisper White, Cameo Coral, and Lavender Lace.

  • This is a 5 1/2" square card with a base of Lavender Lace.
  • Cameo Coral textured card stock came next. I used the medallion stamp in the upper right corner in Versamark, then I heat embossed it using clear powder.
  • To distress the edges, I grabbed my cutter kit. TIP: The cutter kit is an awesome tool that has not only a distressing option, but tools for cutting, scoring, and perforating. I simply rubbed the distressing tool across all the edges.
  • A 1" strip of Whisper White was dry embossed using my Big Shot and the dot pattern from the SU Backgrounds I Texturz Plates. This was also given some distressing using the technique above.
  • Cameo Coral ink was dabbed all over the dots and edges using a sponge.
  • A 1 1/2" strip of Apricot Appeal was given a scallop border and layered onto a 2" strip of Lavender Lace.
  • Whisper White ribbon was tied around the piece before it was adhered to the card.
  • Lavender Lace and Basic Black SU Markers were used to color directly onto the sentiment image before being stamped onto Whisper White. TIP: When using a sentiment as the focal point, I like to off-center it for some added interest.
  • The Whisper White was also distressed and the edges were inked up using a sponge and Lavender Lace ink.
  • The Big Shot came into play for the flowers. I used it with Lavender Lace card stock and the Cherry Blossom Embosslit. A Pretties Kit Half Pearl was used to dot the center before it was attached to the card with dimensionals.
  • The Trio Flower punch was used with more Lavender Lace and Cameo Coral. I used some tiny half-pearl stickers (Recollections) for the centers.

Well we are off for vacation, but don't worry- I will be back to create soon!


Order Stampin' Up! online 24-7! Click Here!

Recipe: Stamps: Medallion (115223), Sincere Salutations (115068) Ink: Lavender Lace (101305), Cameo Coral (103035), Basic Black SU Marker (105394), Versamark (102283) Paper: Soft Subtles Textured (108695), Earth Elements Textured (108697), Whisper White (100730) Accessories: Big Shot (113439), SU Backgrounds I Texturz Plates (114512), Cherry Blossom Embosslit (114516), Whisper White Taffeta Ribbon (109070), Trio Flower Punch (109183), Cutter Kit (106958), Pretties Kit (109114), Clear Embossing Powder (109130), Scallop Edge punch (112091)

Thursday, August 20, 2009

PPA4: Anything But a Card

I am so excited about today's project because I had so much fun creating it! This will be dropped off at my mom's office later today. I'm thinking she will love it!

This week's Pals Paper Arts challenge is to create anything but a card. This is definitely not a card, but it incorporates some new products from SU!

Here is how I made it:
  • I used a sneak peek stamp set from the Holiday Mini (products available Sept. 1st). The set I used is called Sweet Centers. It was designed to accommodate the new Sweet Treat cups (also used in this project).
  • Using my stamp-a-ma-jig, I stamped the petal image onto Whisper White card stock several times to create Melon Mambo and Rich Razzleberry flowers. This took some time to get right. The petals need to be stamped overlapping each other so that the 1 3/4" circle punch will fit in the center properly. I noticed that if I lined each petal up corner-to-corner, then snipped the flower out, the punch couldn't reach. Another way to use this stamp would be to punch out a circle from card stock and use the stamp-a-ma-jig to line up the petals to the hole. But that would be more suited for a card, since the flower would not ultimately be snipped out.
  • Before snipping out the flowers, I pressed a Versamark pad all over my paper and heat embossed it with Iridescent Ice.
  • Next, I took Rich Razzleberry and Melon Mambo card stock and lightly attached it to the back of the Whisper White stamped card stock using Dotto Removable Adhesive.
  • With the two pieces of paper attached, I snipped out each flower. The extra card stock will be for the back of each flower for a cleaner look (see photo).
  • After separating the two pieces and removing the adhesive, I popped out the circle on just the stamped flower piece. TIP: An easy way to do this is to flip the punch over so you can line up the image in the opening.
  • For the solid card stock flowers, I took a ruler and the perforating tool from the Cutter Kit, and perforated the center of each one (see photo). The reason for this is so that the candy can be more easily accessed without tearing apart the entire flower.
  • I filled my treat cups with some Skittles (smile) and attached them to the Melon Mambo and Rich Razzleberry flower centers (not the circle punched flowers).
  • I created the stems by using some bamboo skewers. I covered them with Certainly Celery ribbon (SAB freebie) using sticky strip. More ribbon was tied near the top to mimic the look of leaves. TIP: Make sure to cut down the stems to different heights for more dimension!
  • The top of each stem was adhered below the sweet treat cup on the solid flower using large glue dots (several all around-including the top!). 3 layers of dimensionals were added to all the other petals so that the top flower would be level.
  • Lastly, I lined up and attached the top flower to the bottom. TIP: I kept all my flowers together through the whole process so I wouldn't forget which embossed flowers went with the solid card stock ones. Otherwise it could be a mess to figure out which one lined up with what (think turning the cut out top of a carved pumpkin over and over to line it up! At least that is what I kept thinking of :).
  • I used an over-sized mug to hold all my flowers. Florist foam was pressed down into the bottom to keep them in place.
  • I took pieces of Soft Suede and Chocolate Chip card stock and ran them through my Paper Crimping tool and then through a paper shredder to get a filler for the rest of the mug.
  • Gorgeous 1 1/4" Striped Chocolate Chip ribbon was tied around the bottom. TIP: I used a glue dot on the front and back to keep it from sliding down.
  • The final touch: my stamped tag. Using the Great Friend set, I stamped the frame in Soft Suede ink. Next I repeatedly stamped the stem image using Certainly Celery (without re-inking). Again using my stamp-a-ma-jig, I stamped the sentiment in the center. I colored it in using Basic Black and Melon Mambo SU markers.
  • I got double duty out of my 1 3/4" Circle punch. It fit perfectly around the Great Friend frame.
  • A small hole was punched near the top using my Crop-a-dile and Hemp Twine was tied through (and around a flower stem).
  • The butterfly was created using a Martha Stewart punch and Razzleberry Lemonade DSP. Three little half pearls (non-SU) dot the center.

I hope this inspired you to make your own "anything but a card" project! Be sure to load your projects from your blog or online gallery at Pals Paper Arts- you could be a Pals Paper Arts Artist Pick!


Order Stampin' Up! online 24-7! Click Here!

Recipe: Stamps: Sweet Centers (available Sept. 1st), Great Friend (113792) Ink: Rich Razzleberry (115658), Melon Mambo (115656), Soft Suede (115657), Certainly Celery (105217), Basic Black SU Marker (100082), Versamark (102283) Paper: Whisper White (100730), Rich Razzleberry (115316), Melon Mambo (115320), Razzleberry Lemonade DSP (115675), Chocolate Chip (102128), Soft Suede (115318) Accessories: Sweet Treat Cups (available Sept. 1st), 1 3/4" Circle Punch (112004), Stamp-a-ma-jig (101049), Crop-a-dile (108362), Paper Snips (103579), Glue Dots (104183), Dimensionals (104430), Iridescent Ice Embossing Powder (101930), Heat Tool (100005), Certainly Celery Ribbon (SAB Freebie), 1 1/4" Chocolate Chip Striped Ribbon (115617), Hemp Twine (100982), Paper Crimper (101618), Sticky Strip (104294), Cutter Kit (106958) Other: Bamboo Skewers, Martha Stewart Butterfly Punch, Mug, Florist Foam, Stick-On Half Pearls, Skittles

Monday, August 17, 2009

Happy Mojo Monday!

Wow! Mojo Monday is already up to 100 sketches! This week's 100th sketch was quite challenging for me. I ended up leaving out the larger scalloped circle. I kept trying to cut one out and it just didn't look good! Note to self: Purchase the scallop circles die!

  • This is a standard A2 Chocolate Chip card base.
  • A layer of Old Olive came next (I love lots of layers!)
  • A slightly smaller piece of Rose Red took a trip through my Big Shot with one of the SU Backgrounds I Texturz Plates. TIP: I put an extra piece of card stock on top of my "sandwich" before I run it through for a more defined impression.
  • I used one of the patterns from the Dots & Design's Rub-on's. The pattern easily transferred onto a 1" piece of Chocolate Chip.
  • 1" Double Stitched Rose Red ribbon hid the raw edge of the Chocolate Chip card stock.
  • "Hello", from Chic Boutique, was inked up in Rose Red and stamped onto Very Vanilla. It was popped out using a 1 1/4" circle punch and layered onto a 1 3/8" Chocolate Chip circle, and an Old Olive scallop circle.
  • The sentiment was attached to the card using dimensionals.
  • To create the focal point, I used more Chocolate Chip and Old Olive for mats.
  • The dress form image was inked in Jet Black StazOn and stamped onto a Very Vanilla rectangle.
  • All four corners were clipped with the ticket corner punch.
  • I wanted to make it look like there was actually a dress on the form, so I colored in the neck and arm portions using a Perfect Plum SU marker. The rest of the image was filled in with Old Olive and Rose Red.
  • Using a 2-way glue pen, I applied Fine Cosmo glitter to the dress and beads.
Did you know that there is only 2 weeks to become a demonstrator for as little as $85??? If you are interested in more information, click here or email me.

The Holiday Mini goes live in about 2 weeks! If you would like your very own copy, let me know!


Order Stampin' Up! online 24-7! Click Here!


Recipe: Stamps: Chic Boutique (113744) Ink: Jet Black StazOn (101406), Rose Red (100063), Old Olive (100079), Perfect Plum (100035) Paper: Very Vanilla (101650), Chocolate Chip (102128), Old Olive (100702), Rose Red (102544) Accessories: Big Shot (113439), SU Backgrounds I Texturz Plates (114512), Dots & Designs Rub-ons (115728), Scallop Circle Punch (109043), 1 1/4" Circle Punch (104403), 1 3/8" Circle Punch (104401), Ticket Corner Punch (107214), 2-way glue pen (100425), Fine Cosmo Glitter (108796), SU Dimensionals (104430), 1" Double Stitched Rose Red Ribbon (111846)


Thursday, August 13, 2009

Clean and Simple Winter Card

You know you have a serious stamping addiction when you beginning plotting your next card as you are drifting off to sleep at night. At least that is what happens to me! Last night as I was laying in bed I had an idea to try using flocking powder with Sticky Pages. Unfortunately, SU no longer sells flocking powder, but I had a whole jar back from when it was still available. The recommended application process included using Heat and Stick powder- which I could never master. So it sat along with all my other embossing powders and glitters. No need to fear, however. Many online stores still sell it as well as some craft stores.

I am so glad I tried this technique- it turned out beautifully, even though my photo doesn't do it much justice.
Here is how I made the snowman:
  • I covered a piece of Whisper White card stock with a Sticky Page.
  • I popped out the circles using a 1 3/4" punch, a 1 3/8" punch, and a 1 1/4" punch. TIP: You have to use quite a bit more pressure since the sticky page makes the paper so much thicker.
  • After I peeled of the red backing, I applied the Whisper White flocking to each circle. You will need to rub off most of the flocking for a smooth texture.
  • The different circles were decorated with black half-pearl stickers (Recollections), ribbon, and an orange glitter dot (unknown manufacturer).
  • The hat was created using the Round Tab punch, folded in half, with the bottom trimmed to a straight line. I folded Whisper White Taffeta ribbon in half also, and tied it around the top.
  • I dyed Whisper White ribbon blue using the Bashful Blue SU marker for the scarf.
  • Once the card was finished, the snowman was attached the card using dimensionals.
For the card:
  • This is a 5 1/2" square Bashful Blue card.
  • A slightly smaller layer of Brushed Silver Card stock came next.
  • A 2" strip of vellum was trimmed on one side using the Scallop Edge punch, and attached at the bottom of the silver. I used my paper piercing tool to dot the center of each scallop.
  • A 1 1/2" piece of Bashful Blue was covered in a piece of a Sticky Page. It was then also trimmed using the Scallop Edge punch.
  • The red backing was peeled away and large Silver Duo beads were added. TIP: Add the larger beads first, then fill in with the microbeads.
  • I attached the beaded piece with glue dots for added stability.
  • The sentiment is from Sincere Salutations. I used Basic Black and Bashful Blue SU markers to fill it in and stamped it onto Whisper White.
  • I clipped all four corners using the Corner Rounder punch.
  • The 1 3/4" and 1 3/8" circle punches were used again with Bashful Blue and Brushed Silver for some added interest behind the sentiment.

This was a fun card to make, although it is very simplistic in design. Let me know what you think!


Order Stampin' Up! online 24-7! Click Here!


Recipe:
Stamps: Sincere Salutations (115068)
Ink: Bashful Blue (105111), Basic Black (100082)
Paper: Bashful Blue (105120), Whisper White (100730), Brushed Silver (100712), Vellum (101839)
Accessories: 1 3/4" Circle Punch (112004), 1 3/8" Circle Punch (104401), 1 1/4" Circle Punch (104403), Sticky Pages (114300), Scallop Edge Punch (112091), Paper Piercing Tool (116631), Silver Bead Duo (110755), Corner Rounder Punch (109047), Dimensionals (104430), Whisper White Taffeta Ribbon (109070), Round Tab Punch (108340), Flocking (retired), Glitter Dot (non-SU), Black Half-pearls (non-SU)

PPA3: An Inspiration

Wow! Are we really on challenge #3, already? I am having so much fun and I can't believe how the time is flying. If you haven't already checked out Pal's Paper Arts, and played in one of our challenges, you should! The challenges vary each week, so there is always something fresh to see.

This week is an Inspiration challenge. The goal is to create a project using a photo from Pottery Barn Kids as inspiration.


Here is how I made my card:
  • I used Very Vanilla textured as a base. It measures 5 1/2" x 5 1/2".
  • Layers of Real Red and Brilliant Blue came next.
  • Before attaching the Brilliant Blue, I ran it through my Big Shot with the large dot pattern from the SU Backgrounds Texturz Plates. TIP: I use extra pieces of card stock on the outside of my "sandwich" to make for a deeper impression.
  • A Crushed Curry Patterns print came next. I used just a 1" piece for the left side, and wrapped some 5/8" Real Red Grosgrain around it before attaching it to the card.
  • Very Vanilla, matted on Crushed Curry, served as a backdrop for my giraffe and sentiment.
  • The giraffe is from Animal Crackers. I inked it up in Jet Black StazOn and stamped it onto Whisper White. Next, I filled it in using a Blender Pen and Pumpkin Pie and Crushed Curry ink pads.
  • Using a 2-way glue pen, I added some Dazzling Diamonds glitter to the star.
  • Crystal Effects was dabbed just on the spots of the giraffe. TIP: Make sure to give the Crystal Effects plenty of time to dry. I think I let mine sit out for about 90 minutes.
  • I snipped out the giraffe (this took some time because of that little tail and long skinny neck!) and attached him to the card using dimensionals.
  • I isolated the sentiment on the stamp using a Basic Black SU Marker and stamped it onto Very Vanilla. It fit perfectly inside the Word Window Punch. Lastly it was layered onto a Real Red Modern Label.
  • Two Silver brads were the finishing touches!

I hope you, too, will play along at PPA!


Order Stampin' Up! online 24-7! Click Here!


Recipe:
Stamps: Animal Crackers (113395)
Ink: Jet Black StazOn, Crushed Curry (115659), Pumpkin Pie (105216), Basic Black SU Marker (100082)
Paper: Very Vanilla Textured (108693), Whisper White (100730), Real Red (102482), Brilliant Blue (100721), Crushed Curry (115319), Crushed Curry Patterns Pack DSP (115686)
Accessories: Big Shot (113439), SU Backgrounds Texturz Plates (114512), 5/8" Real Red Grosgrain (109052), Word Window Punch (105090), Modern Label Punch (116630), Silver Brads (104336), Crystal Effects (101055), 2-way Glue Pen (100425), Dazzling Diamonds glitter (102023), Dimensionals (104430)

Tuesday, August 11, 2009

Parade of Birthday Cards

Yesterday (at 10:51pm, to be exact!) I turned 26. Yep, I am officially in my late twenties, yikes! :)

As a birthday gift to myself, I decided to do an easy post for today and show off all the beautiful handmade cards I received:


By: Kris Kilcoyne at Kween Bee Kreations


By: Patti MacLeith at Papercrafts by Patti


By: Mary Fish at Stampin' Pretty


By: Tricia Tabar (she doesn't yet have a blog, but with her talent, she needs one!)


Thanks Ladies for making my birthday extra special!


Monday, August 10, 2009

Mojo 99- Thoroughly Modern

I had so much fun with this week's Mojo Sketch. The funny thing is, I used butterflies in last weeks sketch, too! I guess I just love them!

The sketch looked pretty complicated at first, but the design team for Mojo Monday always provides great inspiration to help you get started.

  • I used Sahara Sand textured card stock for the base- 5 1/2"x 4 1/4".
  • A striped pattern from Thoroughly Modern came next.
  • The polka dot patterns are also from Thoroughly Modern. I layered the rectangles onto Bermuda Bay textured card stock.
  • A Very Vanilla rectangle served as a backdrop for my butterfly and sentiment.
  • I used layers of Sahara Sand textured, and Soft Suede behind the butterfly.
  • The butterfly was created using a small Sticky Page and a Rose Red print from Thoroughly Modern. I ran them through my Big Shot with the Beautiful Butterflies die. TIP: The easiest way I found to do this is to peel one side of the Sticky Page and stick it to the paper. Then run the whole piece through the Big Shot. This might seem like common sense to most of you, but lets just say I have tried to run them through individually and stick the cut out pieces to each other and it wasn't pretty ;-).
  • I peeled off the red backing from the die cut and attached a small sliver of Bermuda Bay to the center. The rest was covered in clear microbeads.
  • The tail of the Bermuda Bay was pulled around the back to the top to look like antennae. I used the end of my paper piercing tool to curl them.
  • The sentiment, from Bitty Birthday, was inked up in Rose Red and stamped above the butterfly (with the help of a stamp-a-ma-jig).
  • I used 1 1/4" and 1 3/8" circle punches to pop out circles in Soft Suede and Bermuda Bay. After I adhered them together, I attached half of the piece to the Very Vanilla, then I flipped it over and trimmed the excess.
  • A build-a-brad, created using more Thoroughly Modern, was added to the half circle, and some 1" double stitched Rose Red Ribbon was added behind the Very Vanilla.
  • After adhering the ribbon, I attached the whole piece using dimensionals. TIP: Because of the bulk created from attaching the ribbon and build-a-brad, dimensionals were necessary. It wasn't in my original plan, but I like the way it looks anyway!

Don't forget to play along this Thursday at Pal's Paper Arts! We will have a fun new challenge ready for you at 5am CST!


Order Stampin' Up! online 24-7! Click Here!


Recipe:
Stamps: Bitty Birthday (114934)
Ink: Rose Red (101778)
Paper: Very Vanilla (101650), Sahara Sand (105328), Soft Suede (115318), Bermuda Bay (115317), Thoroughly Modern DSP (115673)
Accessories: Big Shot (113439), Beautiful Butterflies Die (114507), Sticky Pages (114300), Clear Microbeads (104266), Build-a-brad (109108), 1/2" Circle Punch (104390), 1 1/4" Circle Punch (104403), 1 3/8" Circle Punch (104401), 1" Double Stitched Rose Red Ribbon (111846), Stampin' Dimensionals (104430), Paper Piercing Tool (116631), Stamp-a-ma-jig (101049)

Saturday, August 8, 2009

New! Build-a-bear Workshop!

This just might be the most girlie card I have ever posted! I just received my demonstrator pre-order shipment yesterday, and my brand-new Build-a-bear Workshop stamps were included (available Sept. 1st)! It is such a fun line that Stampin' Up! has done teaming up with the popular kid (and adult!) store. Since I am a demonstrator, I am able to purchase products before they go "live" to customers. Want to know how you can benefit from this, too? Email me to find out all the exciting details, and hear about some awesome promotions!

Anyway, I bought 2 BABW sets: Beary Best Friends (cute line image stamps) and Beary Nice Wishes (a coordinating sentiment set). I had to ink up this cute little girl bear right away!

  • When I saw this stamp set I immediately thought of using my Tea Party DSP (although there is coordinating Build-a-bear DSP that will be available for ordering on September 1st).
  • The card started with an Almost Amethyst base (5 1/2"x 4 1/4").
  • The open corners were clipped with a corner rounder punch (both front and back).
  • A 1" strip of striped DSP was attached near the bottom.
  • I inked the sentiment in Almost Amethyst and stamped it just below the DSP.
  • Pretty in Pink Striped Grosgrain was adhered down the center of the the card (front and back) and tied off the side, holding the card closed.
  • Using my Big Shot and the Scallop Frame die, I punched out the frame and inside oval using Whisper White Textured card stock and more Tea Party DSP.
  • The bear stamp was inked up in Jet Black StazOn and stamped onto Watercolor paper. The flower stamp was strategically stamped into the bear's hand.
  • I used a blender pen and ink pads (Close to Cocoa, Chocolate Chip, Handsome Hunter, Creamy Caramel, and Regal Rose) to fill in the bear.
  • She was snipped out and adhered to the oval using dimensionals.
  • I found these tiny half pearls at Michael's. They are cool because they are all attached together by one big glue line, or you can pull them off to use individually. I kept them all together to go over the seam between the oval and frame.
  • I ran out of the half pearls and had to think of a good solution, so these beautiful Sherbet Designer Buttons came into play. I used larger half pearls (Pretties Kit) in the centers of the flower buttons, and some White Taffeta Ribbon was tied through the larger button. TIP: It is really easy to use the taffeta ribbon with buttons. I just trimmed the ends to a fine point to pull it through, but you could easily use a needle and thread, too.
Unfortunately, I am not able to share the catalog images in the Holiday Mini until they go live on September 1st. However, stay tuned because I will have more sneak peek projects to share. If you would like your very own copy of the Holiday Mini, please email me and I will send one out to you as soon as they are available!


Order Stampin' Up! online 24-7! Click Here!

Recipe:
Stamps: Beary Best Friends (available Sept. 1st), Beary Nice Wishes (available Sept. 1st)
Ink: Jet Black StazOn (101406), Almost Amethyst (101723), Close to Cocoa (103139), Chocolate Chip (100908), Regal Rose (105211), Handsome Hunter (105215), Creamy Caramel (103220)
Paper: Whisper White Textured (108693), Almost Amethyst (102158), Tea Party DSP (113992), Watercolor Paper (105091)
Accessories: Big Shot (113439), Scallop Oval Frame Die (114521), Pretty in Pink Striped Grosgrain (113882), Pretties Kit (109114), Sherbet Designer Buttons (116312), Dimensionals (104430), Corner Rounder Punch (109047), Mini Half Pearls (non-su)

Thursday, August 6, 2009

It's Good to Dream: SC240

I had a lot of fun with Splitcoast's sketch 240. I love anything that incorporates circles!

Here is how I made this card:
  • This is a 5 1/2"x4 1/4" card base of Bashful Blue.
  • I randomly stamped the flower image from Razzle Dazzle on the bottom half of the card using Bashful Blue ink.
  • A 5 1/2"x 1 1/2" piece of Melon Mambo took a trip through my Big Shot with the Perfect Details Texturz Plate. TIP: I used extra pieces of card stock on top of my "sandwich" for a deeper impression.
  • Melon Mambo Polka Dot Grosgrain was tied off to the side.
  • For the circle element, I used the new Medallion stamp (inked up in Melon Mambo and stamped onto Whisper White). I trimmed out the inside scallop circle and mounted it onto a slightly larger circle of Melon Mambo (cut using my Circle Scissors Plus). TIP: My original plan did not include adding the Melon circle, but my cutting job on the scallops wasn't so great and this helped to hide any imperfections.
  • Another slightly larger circle of Certainly Celery came next. TIP: The dial feature on the Circle Scissors Plus makes layering a breeze.
  • The main image from Razzle Dazzle was filled in using Certainly Celery, Bashful Blue and Melon Mambo SU Markers. I repeated the process onto a second piece of Whisper White so that I could cut out some of the leaves and blooms.
  • The cut out pieces were popped up using dimensionals.
  • Dazzling Diamonds glitter was added to the blooms with the help of a 2-way glue pen.
  • The sentiment was inked up in Melon Mambo and strategically placed using a stamp-a-ma-jig.
  • Two small filigree brads were attached to the card using glue dots.
  • I disassembled two Circle Ice Rhinestone brads and used more glue dots to attach them to the center of the brads.
I love the rhinestones and sparkle!


Order Stampin' Up! online 24-7! Click Here!

Recipe:
Stamps: Medallion (115223), Razzle Dazzle (116714)
Ink: Certainly Celery (105217), Melon Mambo (115656), Bashful Blue (105209)
Paper: Whisper White (100730), Bashful Blue (105120), Melon Mambo 9115320), Certainly Celery (105125)
Accessories: Big Shot (113439), Perfect Details Texturz Plate (115962), Filigree Brads (112577), Circle Ice Rhinestone Brads (109111), Melon Mambo Polka Dot Grosgrain (115611), Dazzling Diamonds Glitter (102023), 2-way Glue Pen (100425), Stampin' Dimensionals (104430), Circle Scissors Plus (112530)


PPA2: Sketch Challenge!

Onto week 2 of our brand-new challenge blog- Pals Paper Arts. This week we have a sketch challenge (below). Play along and wear our badge! Upload to Pals Paper Arts, and you could win the Artist's Pick badge for your own blog!

I was going for more of a fall look for my card. The photo doesn't do the pheasant justice- after stamping I embossed it with Iridescent Ice.

Here are all the specifics:

  • This Old Olive card base measures 5.5"x 4.25".
  • Bravo Burgundy came next. In keeping with the sketch, I used my Scallop Edge punch at the bottom.
  • Another layer of Crushed Curry Pattern DSP was also scallop punched.
  • Whisper White taffeta ribbon turned Old Olive with the help of an SU Marker. TIP: Be sure to give it plenty of time to dry before using!
  • The sentiment, from Garden Greetings, was inked up in Old Olive and stamped onto the print.
  • The wheat image from Autumn Days was dipped in Crushed Curry and stamped repeatedly on one side of Whisper White. TIP: For more dimension, do not re-ink between stamping.
  • The pheasant was stamped next using Bravo Burgundy. I used a Versamark pen directly onto the pheasant and heat embossed it using Iridescent Ice.
  • Three Fire Circle Rhinestone brads dress up the corner. TIP: a paper piercing tool and the mat pack template made placement super easy.
  • To keep the pheasant from looking like it was floating, I dipped a blender pen into the Bravo Burgundy ink to create the ground :).
I hope you will play along this week!


Order Stampin' Up! online 24-7! Click Here!


Recipe: Stamps: Autumn Days (115452), Garden Greetings (113716) Ink: Old Olive (102277), Crushed Curry (115659), Bravo Burgundy (105214) Paper: Whisper White (100730), Old Olive (103124), Bravo Burgundy (105123), Crushed Curry Patterns Pack DSP (115686) Accessories: Heat Tool (100005), Versamark Pen (100901), Iridescent Ice embossing powder (101930), Whisper White Taffeta Ribbon (109070), Scallop Edge Punch (112091), Paper Piercing Tool (116631), Mat Pack (105826), Fire Circle Rhinestone brads (109110)

Monday, August 3, 2009

Mojo Monday 98!

This weeks sketch from Mojo Monday was a bit of a challenge for me. But it's supposed to be, right?

Here is how I put the card together:
  • It started off with a Rich Razzleberry base- it is a full sheet of 8 1/2"x11" folded in half, and then I trimmed an inch off the side.
  • A 5.25" square of Soft Suede Textured came next, with two smaller squares of Rich Razzleberry and Whisper White.
  • I gave the Whisper White some paper piercing detail in the corners.
  • I used my Big Shot and the Scallop Circle die to cut the Razzleberry scallop circle.
  • I was able to cut two smaller circles (from Whisper White and a Soft Suede Thoroughly Modern print) using my Circle Scissors Plus.
  • The sentiment, from Great Friend, was inked up in Rich Razzleberry, stamped onto Whisper White and popped out using the Modern Label punch.
  • The butterflies were created using my Big Shot and the Beautiful Butterflies die. I cut out a small and large one using Rich Razzleberry prints and window sheets. The two were attached to each other with the help of circle rhinestone brads.
  • The flowers are from the Pretties Kit. I simply took a Rich Razzleberry SU marker to change the color and let them dry. Brads were used in the centers.
  • For the bow, I cut a piece of Rich Razzleberry card stock that was the width of the card. Then I was able to wrap the ribbon around that piece, instead of cutting into the card base and having the ribbon exposed on the inside.
Exciting Announcements!

Just For Kids campaign: Get a FREE package of designer buttons (a $7.95 value) when you spend $35 on stamps from the Growing Up section! Click here for more details!

The Country Living Cookout Kit is 40% off through August 31st or while supplies last.


Order Stampin' Up! online 24-7! Click Here!


Recipe:
Stamps: Great Friend (113792)
Ink: Rich Razzleberry (115658)
Paper: Rich Razzleberry (115316), Soft Suede (115318), Whisper White (100730), Thoroughly Modern Designer Series Paper (115673), Rich Razzleberry Patterns Pack DSP (115685)
Accessories: Big Shot (113439), Scallop Circle Die (113468), Beautiful Butterflies Die (114507), Circle Scissors Plus (112530), Pretties Kit (109114), Modern Label Punch (116630), Soft Suede Polka Dot Grosgrain (115612), Paper Piercing Tool (116631), Mat Pack (105826), Circle Rhinestone Brads (113144), Silver Brads (104336), Mini Glue Dots (103683), Window Sheets (114323)