Tuesday, September 29, 2009

Stampin' Up! Clearance Rack


Don't miss out on savings up to 80% off on some retired Stampin' Up! product! For the first time ever, Stampin' Up is offering a clearance rack sale on some surplus inventory!!

Click my "Shop Now" button to begin!!!


Monday, September 28, 2009

Matchbox Shower Favors

As if I haven't posted enough baby shower related projects, I have another to share today!

I made these favor boxes for a couple showers I am hosting in the next month. I made 20 of each, but since I have the Matchbox Bigz XL die, it went very quickly.

For the boy favors I used variations of Bashful Blue, Chocolate Chip, Certainly Celery, and Whisper White. For the girl favors, I used Pretty in Pink, Certainly Celery, and Whisper White.
Here are some details:
  • I ran the card stock through my Big Shot with the Matchbox Bigz XL die (using the Premium Crease Pad to get all those score lines!). TIP: I used enough card stock to also punch out the frame die cut, which I set aside.
  • The sleeve portion of the boxes was run through the Big Shot again using various Texturz Plates. TIP: I run two extra pieces of card stock through on top of the sandwich for a deeper impression.
  • I assembled the boxes using Sticky Strip for a stronger hold.
  • Contrasting card stock strips were wrapped around the top portion.
  • A 1" strip of Whisper White was given a scalloped or eyelet border and was wrapped around over the previous strip.
  • Grosgrain ribbon was tied in a simple knot.
  • The sentiment was inked in Chocolate Chip and stamped onto the frame die cuts. I used my Crop-a-dile to punch out a hole on the left side.
  • Hemp Twine was used to secure the tag to the ribbon.
I plan to fill these little boxes with small truffles or other chocolates. I know it is a bit fancy for a baby shower, but when it is this easy I just can't help myself! :)


Order Stampin' Up! online 24-7! Click Here!

Recipe: Stamps: Garden Greetings (113716) Ink: Chocolate Chip (100908) Paper: Certainly Celery (105125), Pretty in Pink (100459), Whisper White (100730), Chocolate Chip (102128), Bashful Blue (105120) Accessories: Big Shot (113439), Matchbox Bigz XL die (114890), Pretty in Pink Striped Grosgrain (113882), Certainly Celery ribbon (SAB Freebie), Eyelet Border Punch (113692), Scallop Edge Punch (112091), Hemp Twine (100982), SU Backgrounds I Texturz Plates (114512), Perfect Details Texturz Plate (115962), Crop-a-dile (108362), Sticky Strip (104292)


Thursday, September 24, 2009

PPA9: Picture Perfect Inspiration

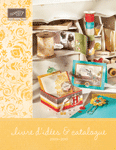
This Saturday I will be attending the Stampin' Up! Half-Day Regional in Coeur d'Alene, ID. I am so SO excited! I made 50 of these Autumn-themed boxes to swap with some fellow demos.

My inspiration behind the boxes comes from this weeks Pals Paper Arts Picture Challenge. The idea behind the challenge is to make a project inspired by this photo:

Your project can incorporate the colors, images, or overall feel of the photo.
Here are the steps for making my project:
  • I used my Big Shot and Matchbox Bigz XL die to create the boxes. I used patterns from Autumn Traditions DSP and Autumn Meadows DSP for the sleeves, and Really Rust, More Mustard, and Always Artichoke for the boxes. TIP: Be sure to use a Premium Crease pad to achieve perfect die cuts with score lines!
  • I assembled the box bases, following the instructions that came with the die.
  • Before I assembled the sleeves, I popped out a 1 3/8" circle from the front.
  • The little leaves, from Autumn Days, were stamped using Really Rust and More Mustard. They were snipped out (yes, I snipped out 100 of these by hand!) and attached using dimensionals.
  • I used some small treat bags and found some specialty candy corn at a grocery store to fill the boxes. I wanted colors that would compliment the boxes (not the typical white/yellow/orange). I ended up using Caramel Apple, Chocolate, and Caramel/Chocolate- very tasty I might add.
  • The treat bags were folded nicely inside the box to be seen through the circle window.
  • Lastly, Hemp Twine was wrapped around the box and tied into a bow in the upper corner.
I hope that all the gals receiving this will like it!


Order Stampin' Up! online 24-7! Click here!

Recipe: Stamps: Autumn Days (115452) Ink: Really Rust (102549), More Mustard (103162) Paper: Autumn Meadows DSP (116769), Autumn Traditions DSP (115668), Always Artichoke (105119), Really Rust (100661), More Mustard (100946), Whisper White (100730) Accessories: Big Shot (113439), Matchbox Bigz XL die (114890), Hemp Twine (100982), 1 3/8" Circle Punch (104401), Dimensionals (104430)
Other: Candy Corn, Treat Bags

Wednesday, September 23, 2009

Ballerina Bear

I swear that this is the last you will see of this little bear from me for awhile, but I just had to use it for this card!

My good friend is so excited to be having a baby girl in January and I am a shower host so of course I signed up to make invites. The bedding she picked out is called Twirling Around from Babies R Us. When I saw it, I knew exactly what I was going to do for her invites! I made about 2o of these cards so the design is simple but oh-so-cute!

Here are the details:
  • This is a Pretty in Pink A2 card base.
  • The Regal Rose pattern print on the left is from the retired Hostess Level 1 Patterns Pack Designer Series Paper II. It measures 4.25"x1".
  • I wrapped this gorgeous Whisper White Organza around the DSP and tied it in a pretty bow before adhering it to the card.
  • A 4.25"x1" piece of Whisper White was given an eyelet border at attached next.
  • The bear image was stamped onto Watercolor paper and filled in using a blender pen and varying shades of Creamy Caramel. It was snipped out using paper snips. TIP: Paper snips are a must-have when trimming out detailed images.
  • The bear became a "she" by adding some pink organza ribbon (non-SU) for a tutu and hair bow. I took some white craft wire to cinch up one side of the 1/2" piece of ribbon and used some Scotch tape to hold it in place behind the bear. A smaller (1/4") piece of ribbon was tied into a simple knot and held in place with a mini glue dot for the hair bow.
  • A 2"x2" piece of Whisper White was "texturized" using a dot embossing folder (non-su) and my Big Shot. I layered it onto a slightly larger piece of Regal Rose.
  • The little ballerina was added last using dimensionals.
  • Little half pearl stickers (various sizes) were the finishing touch!
Don't forget! Friday is your last day to take advantage of my exclusive promotion!!!
For 1 week only place an order of $50 or more through my online store, and choose any Rub-on package for FREE!!! Here are some promotion details:
  • Place an order of $50 or more (before tax and shipping) through my online store. Look for the Shop Now button.
  • Email me with your choice of rub-ons.
  • Your free rub-ons will arrive separately from your order about 2 weeks later.
  • Every $50 order qualifies. So if you order $100 you would get to choose 2 sets of rub-ons! Remember that hostess benefits come into play at $150.
  • Promotion ends September 25, 2009.


Order Stampin' Up! online 24-7! Click Here!

Recipe:
Stamps: Cute & Cuddly (113682)
Ink: Creamy Caramel (103220), Basic Black (101179)
Paper: Pretty in Pink (100459), Regal Rose (105130), Whisper White (100730), Watercolor Paper (105019), Patterns Pack Designer Series Paper II (retired-hostess)
Accessories: Big Shot (113439), Whisper White Organza Ribbon (114319), Eyelet Border Punch (113692), Dimensionals (104430), Mini-glue dots (103683)
Non-SU: Half-pearl stickers, Pink Organza Ribbon, Embossing Folder, Craft Wire

Saturday, September 19, 2009

Baptism Card

Here's a quick Saturday morning post. Last night we attended a baptism for some good friends of ours' little girl. She is 7 months, and so adorable. We love her!

Here is the card that I made:

  • I started with a Certainly Celery base (A2).
  • Next I took the polka dot print from Cottage Wall DSP and cut it down to the width of the card before giving it an eyelet border.
  • Whisper White Organza ribbon was tied around the polka dot print and tied off to the side before attaching it to the card base.
  • Whisper White card stock was given a swirl texture using my Big Shot and SU Backgrounds I Texturz Impression Plates.
  • Regal Rose was sponged all over the Whisper White to bring out the texture.
  • I cut off two strips measuring 1/2"x2 and 1/2"x3" to create the cross. The cross was adhered to Regal Rose card stock and was snipped out to create a border.
  • A small Filigree brad and Ice Circle Rhinestone Brad were added in the center before the cross was attached using dimensionals.
  • I actually printed the bible verse using MS Word and printed it on Whisper White card stock. It was matted in more Regal Rose.
  • Two small butterflies (using a non-su punch) were added at the top using mini-glue dots in the center.
  • For a little more detail, I used some pearl stickers (non-su) in the center of the butterflies and I also drew on some dash lines using a Certainly Celery SU marker.

Simple card, but I think it turned out pretty good!

Carried Away With Creativity Exclusive Promotion!!!
For 1 week only place an order of $50 or more through my online store, and choose any Rub-on package for FREE!!! Here are some promotion details:
  • Place an order of $50 or more (before tax and shipping) through my online store. Look for the Shop Now button.
  • Email me with your choice of rub-ons.
  • Your free rub-ons will arrive separately from your order about 2 weeks later.
  • Every $50 order qualifies. So if you order $100 you would get to choose 2 sets of rub-ons! Remember that hostess benefits come into play at $150.
  • Promotion ends October 25, 2009.


Order Stampin' Up! online 24-7! Click Here!


Recipe:
Stamps: None
Ink: Regal Rose (105211)
Paper: Whisper White (100730), Certainly Celery (105125), Regal Rose (105130), Cottage Wall DSP (115671)
Accessories: Big Shot (113439), SU Backgrounds I Texturz Impressions Plates (114512), Filigree Brads (112577), Circle Ice Rhinestone Brads (109111), Dimensionals (104430), Whisper White Organza Ribbon (114319), Eyelet Border Punch (113692), Dimensionals, Butterfly Punch (non-su), Pearl Stickers (non-su)

Friday, September 18, 2009

Seemingly MIA- Secretly Creating

Believe it or not, I haven't had a lot of time to blog lately because I have actually been busy creating. There are several events coming up that I am making invites for, and this week I spent a few days worth of "stampin' time" working on baby shower invites for my sister.

I made about 30 of these cute invites for the shower I am hosting next month. I absolutely love the set Cute & Cuddly, so I had to use it for these invites. You will see it again soon because I am also using it for another shower I am hosting for a friend expecting a girl.

Here is how I made these cards:
  • Use a standard A2 Chocolate Chip base.
  • Run a 4"x 5 1/4" piece of Bashful Blue through a Big Shot using the large dot pattern from SU Backgrounds I Texturz Impressions Plates.
  • Cut a piece of Certainly Celery to 3/4"x 5 1/4". Create a scallop border along one side using the Scallop Edge punch. Adhere to the Bashful Blue.
  • Wrap 5/8" Chocolate Chip Grosgrain Ribbon around the Bashful Blue and tie off to the right side.
  • Adhere the Bashful Blue to the Chocolate Chip.
  • Ink the bear image using Basic Black ink, and stamp onto Watercolor paper. Use a brown Watercolor Pencil to color the bear in the "dark areas". Use a blender pen to draw the color out into the "light area". Snip out the bear and attach to a 2" square of Whisper White using dimensionals.
  • Adhere the Whisper White square to a 2 1/4" square of Certainly Celery, and then onto a 2 1/2" square of Chocolate Chip. Adhere to the Bashful Blue over the Chocolate Chip ribbon.
  • Use Chocolate Chip and Certainly Celery SU markers to color just the wording portion of the stamp. Huff to remoisten the ink and stamp onto Whisper White.
  • Pop out the image using a 1 1/4" Circle Punch. TIP: turn the punch over to line up the image in the center of the punch.
  • Pop out a Bashful Blue circle using a 1 3/8" punch, and adhere it to a Chocolate Chip scallop circle.
  • Attach the sentiment circle to the Bashful Blue circle using dimensionals.
Easy as pie, right? It is actually a pretty simple card, but when you are making 30 of them it can take some time!


Carried Away With Creativity Exclusive Promotion!!!
For 1 week only place an order of $50 or more through my online store, and choose any Rub-on package for FREE!!! Here are some promotion details:
  • Place an order of $50 or more (before tax and shipping) through my online store. Look for the Shop Now button.
  • Email me with your choice of rub-ons.
  • Your free rub-ons will arrive separately from your order about 2 weeks later.
  • Every $50 order qualifies. So if you order $100 you would get to choose 2 sets of rub-ons! Remember that hostess benefits come into play at $150.
  • Promotion ends October 25, 2009.
Don't forget about Sweet Rewards! Choose any item from the Holiday Mini for only $10 when you host a workshop of $250 or more! If you are interested, email me and we can arrange for an in-home workshop. Not in the Spokane area? You can still take advantage of all the hostess benefits from a catalog party!


Order Stampin' Up! online 24-7! Click Here!

Recipe:
Stamps: Cute & Cuddly (113682)
Ink: Basic Black (101179), Certainly Celery (105106), Chocolate Chip (100071)
Paper: Whisper White (100730), Chocolate Chip (102128), Certainly Celery (105125), Bashful Blue (105120), Watercolor Paper (105019)
Accessories: Big Shot (113439), SU Backgrounds I Texturz Impressions Plates (114512), 5/8" Chocolate Chip Grosgrain Ribbon (109051), 1 1/4" Circle Punch (104400), 1 3/8" Circle Punch (104401), Scallop Circle Punch (109043), Scallop Edge Punch (112091), Watercolor Pencils (101879), Blender Pens, Dimensionals (104430)

Thursday, September 17, 2009

PPA8: Keep it Simple, Sweetie!

Today we are hosting a brand-new challenge over at Pals Paper Arts: a Keep it Simple, Sweetie (KISS) challenge!

The guidelines for this challenge are:
  • Clean with lots of 'white' space
  • Simple Designs
  • Minimum time to create
  • Limited layers and embellishments
I tried to accomplish that with today's card, using the new set "Wandering Words". This card was so easy and quick to create!

Here are some details:
  • Start with a Chocolate Chip card base (A2).
  • Dry emboss a 4"x5.25" piece of Real Red using a Big Shot and the new "Petals-a-plenty" Textured Impressions Embossing Folder.
  • Wrap and tie a piece of 5/8" Chocolate Chip grosgrain around the Real Red before adhering it to the Chocolate Chip.
  • Ink the "Happy Christmas..." image in Real Red and stamp it onto Whisper White. Layer it onto a piece of Chocolate Chip. TIP: I only allowed the Chocolate Chip to show above and below the image.
  • Adhere an Old Olive button, from Playground Designer buttons, to the card using mini glue dots. TIP: Use a thin piece of card stock as thread.
How simple is that?! I am actually contemplating having this be the Christmas card that I send out this year. It was so easy, yet I really like the way it turned out.

Don't forget that you can get a FREE copy of the Holiday Mini from me just by emailing me your name and address!


Order Stampin' Up! online 24-7! Click Here!

Recipe:
Stamps: Wandering Words (116507)
Ink: Real Red (103133)
Paper: Chocolate Chip (102128), Real Red (102482), Whisper White (100730)
Accessories: 5/8" Chocolate Chip Grosgrain Ribbon (109051), Playground Designer Buttons (116313), Petals-a-plenty Textured Impressions Embossing Folder (116824), Big Shot (113439), Mini Glue Dots (103683)

Thursday, September 10, 2009

2 Cards for 2 Birthdays!

On Saturday, we have two birthday parties to attend for a couple of our friends little boys. One will be turning 2, and the other will be turning 3. It has been a busy time of year for birthdays!

I made two cards this evening for their birthdays using a couple new sets from the 2009-2010 IBC.

Here are some specifics on the Look Who's Turning 2 card:
  • The Sunny Day Simply Scrappin' Kit was used for the card base, patterned paper, sticker border, and all of the Tempting Turquoise.
  • The cute hippo, from Look Who's Turning, was inked in Pumpkin Pie and stamped onto Whisper White. I covered him in a generous coating of Crystal Effects and let him dry for several hours before snipping him out.
  • The cute hat, from Beary Best Friends, was inked in Basic Black and stamped onto Whisper White. It was colored using Tempting Turquoise and Pumpkin Pie markers before being snipped out.
  • The sentiment was inked in Basic Black and stamped onto Whisper White.
  • The "2" was isolated from the rest of the numbers and popped out with a 1/2" circle punch.
  • Playground Designer Buttons dress up the lower left of the card.
Here are some details on the Greetings Earthling card:
  • The alien was inked in gray ink and stamped onto Whisper White. I used blender pens with Certainly Celery and Brocade Blue to fill him in. He was snipped out and set aside.
  • The space ship was constructed out of Brushed Silver card stock and a 1 3/4" and 1 3/8" circle punches. TIP: I snipped off part of the large circle for more of an oval shape.
  • Windows were created using the small hole punch on my Crop-a-dile. Brocade Blue card stock was attached behind them.
  • 4 legs were cut out of more Brushed Silver.
  • The number 3 is from Lots of Letters On Board Chipboard. I covered it in Whisper White Craft Ink and clear heat embossed it.
  • I cut out a curvy design from some more Brocade Blue and adhered it to the bottom of the card. The space ship was attached to look like it was resting on the ground.
  • The alien was attached using SU dimensionals.
  • The sentiment was inked in Basic Black and stamped onto Whisper White. It has a Brocade Blue mat.
  • I used my Crop-a-dile again to pop out holes all over the top portion of the card to mimic the look of stars (or strange alien symbols?? :). Bashful Blue was attached on the inside of the card for a place to write our own sentiments and also for something to contrast against the holes.


Order Stampin' Up! online 24-7! Click Here!


Recipe for Look Who's Turning card:
Stamps: Look Who's Turning (114403), Beary Best Friends (118052)
Ink: Basic Black (101179), Pumpkin Pie (105115), Tempting Turquoise (100058)
Paper: Sunny Day Simply Scrappin' Kit (115700), Whisper White (100730)
Accessories: Playground Designer Buttons (116313), Hemp Twine (100982), Crystal Effects (101055), 1/2" Circle Punch (104390), SU Dimensionals (104430)

Recipe for Greetings Earthling Card:
Stamps: Greetings Earthling (113810)
Ink: Basic Black (101179), Gray, Certainly Celery (105217), Brocade Blue (101102), Whisper White Craft (101731)
Paper: Basic Gray (108692), Brocade Blue (101166), Whisper White (100730), Bashful Blue (105120)
Accessories: Lots of Letters (112083), Clear Embossing Powder (109130), Heat Tool (100005), 1 3/4" Circle Punch (112004), 1 3/8" Circle Punch (104401), Crop-a-dile (108362), SU Dimensionals (104430)

PPA7: A Sketch Challenge

Today over at Pal's Paper Arts we are hosting a Sketch challenge (see below). I had so much fun with this sketch!

I wanted to try a new color combination (for me anyway). So I started with Dusty Durango (because I have a ton of it), and added Bermuda Bay and Chocolate Chip. I really love how it turned out.

Here are some specific's on the card:
  • This is a standard A2 card (Dusty Durango base).
  • A 2" piece of Bermuda Bay textured card stock was given a scalloped edge before 1 1/4" Striped Chocolate Chip Grosgrain was wrapped around it.
  • Hemp Twine was tied around the ribbon into a bow.
  • The cute birds, from Cheep Talk, were colored using Bermuda Bay, Chocolate Chip, Dusty Durango, and Pumpkin Pie SU Markers. They were stamped onto Whisper White and popped out using the 1 1/4" Circle punch.
  • A 1 3/8" and 1 3/4" circle punches were used to create circle mats out of Chocolate Chip, Bermuda Bay, and Dusty Durango.
  • The sentiment, from Trendy Trees, was inked up in Chocolate Chip and stamped (using a stamp-a-ma-jig) above the birds.
  • A little paper piercing along the side was the finishing touch!
Things have been pretty crazy around our house! I am in the midst of planning 2 baby showers, I have 2 birthday parties to attend this coming weekend, we have to make a trip to the annual Spokane Fair, I have a huge card class in October that I am preparing for (if you are in the Spokane area and are interested in attending, please email me), and lastly, but definitely not least, I am making swaps for the Coeur d' Alene Stampin' Up! Regional Seminar that I will be attending in a few weeks! I am very excited!

Do you have a copy of the Holiday Mini? Email me your name and address and I will send one out to you for FREE!!

Order Stampin' Up! online 24-7! Click Here!

Recipe: Stamps: Cheep Talk, Trendy Trees Ink: Bermuda Bay, Chocolate Chip, Dusty Durango, Pumpkin Pie Paper: Whisper White (100730), Dusty Durango, Bermuda Bay, Chocolate Chip Accessories: 1 1/4" Striped Chocolate Chip Grosgrain (115617), Hemp Twine (100982), 1 1/4" Circle Punch (104403), 1 3/8" Circle Punch (104401), 1 3/4" Circle Punch (112004), Scallop Edge Punch (112091), Paper Piercing Tool (116631), Mat Pack (105826), Stampin' Dimensionals (104430), Stamp-a-ma-jig (101049)

Tuesday, September 8, 2009

Birthday Thank You's

My little man wont officially be 2 until this Friday, but on Saturday we celebrated for him with an Elmo party extravaganza, complete with his own pet fish we named "Dorothy" (from Elmo's World). Unfortunately our fish actually died today but I am hoping I can "replace" her before he notices! Yikes! Poor fish.

Braden, my little guy, received so many nice gifts for his birthday and I am a firm believer in thank you notes. So last night I pumped out 20 of these cards and mailed them out this morning.

Here is how I made them:
  • The card base is Dusty Durango (A2).
  • A 2" piece of Bashful Blue took a trip through my Big Shot with a Stampin' Up Backgrounds I Texturz Plate- the large dot.
  • I used a Bashful Blue ink pad across the pattern to enhance the dots.
  • A small piece of 1 1/4" Pumpkin Pie Striped Grosgrain was attached to the left side of the Bashful Blue. A tiny piece of Natural Hemp Twine was tied around the center.
  • "Thanks" was cut out of Chocolate Chip using a Sizzix Sizzlet and my Big Shot. TIP: I used a sticker machine for adhesive since the pieces were so small.
  • This cute little bear, from the newly released Beary Best Friends, was inked in Basic Black and stamped onto Whisper White.
  • Soft Suede, Creamy Caramel, Close to Cocoa, Dusty Durango, and Bashful Blue markers were used to fill him in.
  • The right corners of the Whisper White were clipped using the corner rounder punch, and was matted onto Chocolate Chip (also corner punched).
  • The bear was attached to the card using Stampin' Dimensionals.
  • A clip from the retired Pewter Hodgepodge Hardware was added in the upper left corner of the Whisper White.
Don't Forget!!!
The Sweet Rewards Hostess Promotion: From September 1-November 30, host a $250 Stampin' Up! workshop, and choose any one item* from the Holiday 2009 Mini Catalog for just $10! *Offer does not include My Digital Studio or hostess sets.

As part of my son turning 2, we have transitioned him to his "big boy bed". It has made for some long nights, that is for sure. So if my cards are not up to par, you will know why ;-).


Order Stampin' Up! online 24-7! Click Here!


Recipe:
Stamps: Beary Best Friends (118052)
Ink: Basic Black (101179), Dusty Durango SU Marker (116329), Close to Cocoa marker (100072), Soft Suede marker (116329), Bashful Blue Marker (105111), Bashful Blue ink pad (105209), Creamy Caramel marker (100078)
Paper: Whisper White (100730), Dusty Durango (115321), Bashful Blue (105120), Chocolate Chip (100908)
Accessories: Big Shot (113439), SU Backgrounds I Texturz Plates (114512), Sizzlet, Retired Hodgepodge Hardware, 1 1/4" Pumpkin Pie Striped Grosgrain (115616), Hemp Twine (100982), Corner Rounder punch (109047), Stampin' Dimensionals (104430)

Thursday, September 3, 2009

PPA6: A Color Challenge!

This week's challenge over at Pals Paper Arts, is a color challenge to use Crushed Curry, Brocade Blue, and Ruby Red. When I think of these colors, I think rustic!


I pulled Out of the Box (hostess set) from my stamp shelf and new immediately that it would be perfect with these colors.


Here is how I made this card:
  • Crushed Curry Textured card stock was used to create a standard A2 base.
  • A 1.5"x4.25" piece of Ruby Red was given a dotted scallop border using the Scallop Edge punch, paper piercing tool, and mat pack.
  • For some added textured, A .5" piece of Brocade Blue was scored and folded at 1/4" intervals.
  • Blue Sherbet Designer Buttons were threaded using Crushed Curry card stock and attached using Glue Dots.
  • I created an extra long tag from Brocade Blue, by cutting a strip of card stock the same width as the Tag punch. Next I flipped the punch upside down, and "threaded" the card stock in through the bottom of the punch and up through the tag portion before punching.
  • Whisper White Taffeta ribbon was tied around the tag before adhering it to the card.
  • The box image was inked up using Brocade Blue and Crushed Curry SU markers and stamped onto Whisper White.
  • A stamp-a-ma-jig was used to place the Basic Black spring image just above the box.
  • The heart was inked up in Ruby Red and stamped onto Whisper White before being snipped out and attached using dimensionals.
  • A little paper piercing detail was added to each side using the paper piercing tool and mat pack.
I hope you will head over to Pal's Paper Arts and play along, too!


Order Stampin' Up! online 24-7! Click Here!

Recipe: Stamps: Out of the Box (115342) Ink: Brocade Blue (100064), Ruby Red (100075), Crushed Curry (116329), Basic Black (101179) Paper: Crushed Curry (115315), Ruby Red (102030), Brocade Blue (101166), Whisper White (100730) Accessories: Sherbet Designer Buttons (116312), Whisper White Taffeta Ribbon (109070), Tag Punch (105934), Scallop Edge Punch (112091), Paper Piercing Tool (116631), Mat Pack (105826), Dimensionals (104430), Stamp-a-ma-jig (101049)

Tuesday, September 1, 2009

Simple Card, New Products

I ordered so much back in July for the release of the new catty, that I completely forgot about some items that I purchased. It felt like Christmas when I rediscovered them! Included in my order was the new Hi Embosslit, and the Seasonal Pieces Window Sheets.

Today's card had a very simple layout, but I think it works well since the embosslit and window sheet give it a lot of character.

Here is how I made it:

  • I started with a standard A2 card base of Rich Razzleberry Textured card stock.
  • A 2"x4.25" piece of Old Olive was attached at the bottom.
  • Next I pulled out my window sheet. TIP: The Seasonal Pieces window sheets come with a variety of patterns for Fall, Winter, Spring, Summer, and more! I cut the window sheet to layer over the Old Olive. Before attaching to the card, I wrapped a piece of Chocolate Chip Taffeta Ribbon around the top edge. TIP: I attached the window sheet using snail, just under the ribbon and underneath where the embosslit would be attached. This prevented the adhesive from showing through.
  • The taffeta ribbon was tied off near the middle of the card.
  • The new Hi Embosslit and my Big Shot were used to quickly pop out the sentiment/focal point out of Brushed Silver. It was attached to the card with dimensionals.
  • The SU Pretties Kit came out to play next. TIP: Just because the flowers start out white, doesn't mean they have to stay that way! You can use ink, Stampin' Pastels, Watercolor Pencils or Crayons, or embossing to alter them! In this case, my flower was heat embossed using Silver powder.
  • An Old Olive felt flower was attached to the Silver one using a clear rhinestone brad and the two were attached to the card using more dimensionals.


I hope you are enjoying the new Holiday Mini Catalog! If you have any questions or comments about any products in the new catty, feel free to leave a comment here or email me.

Here are some exciting announcements from Stampin' Up!:

Sweet Rewards
Host a $250 workshop and choose any item from the Holiday Mini for $10!!!! (excluding My Digital Studio and Hostess Sets). Band a group of friends together and have your own catalog party, or if you are in the Spokane area, I would love to come show you and your friends some new products and techniques at your own workshop!

Watch Me Grow
Get the limited-time Décor Elements Growth Chart before it's gone! Offer ends September 30.


Order Stampin' Up! online 24-7! Click Here!!

Recipe:
Stamps: None
Ink: Versamark (102283)
Paper: Rich Razzleberry (115316), Old Olive (103124), Brushed Silver (100712)
Accessories: Big Shot (113439), Hi Embosslit (115952), Chocolate Chip Taffeta Ribbon (109065), Pretties Kit (109114), Accents and Elements Felt Flower Fusion (110720), Seasonal Pieces Window Sheets (115706), Dimensionals (104430), Silver Embossing Powder (109131), Heat Tool (100005)